Hello everyone!!!
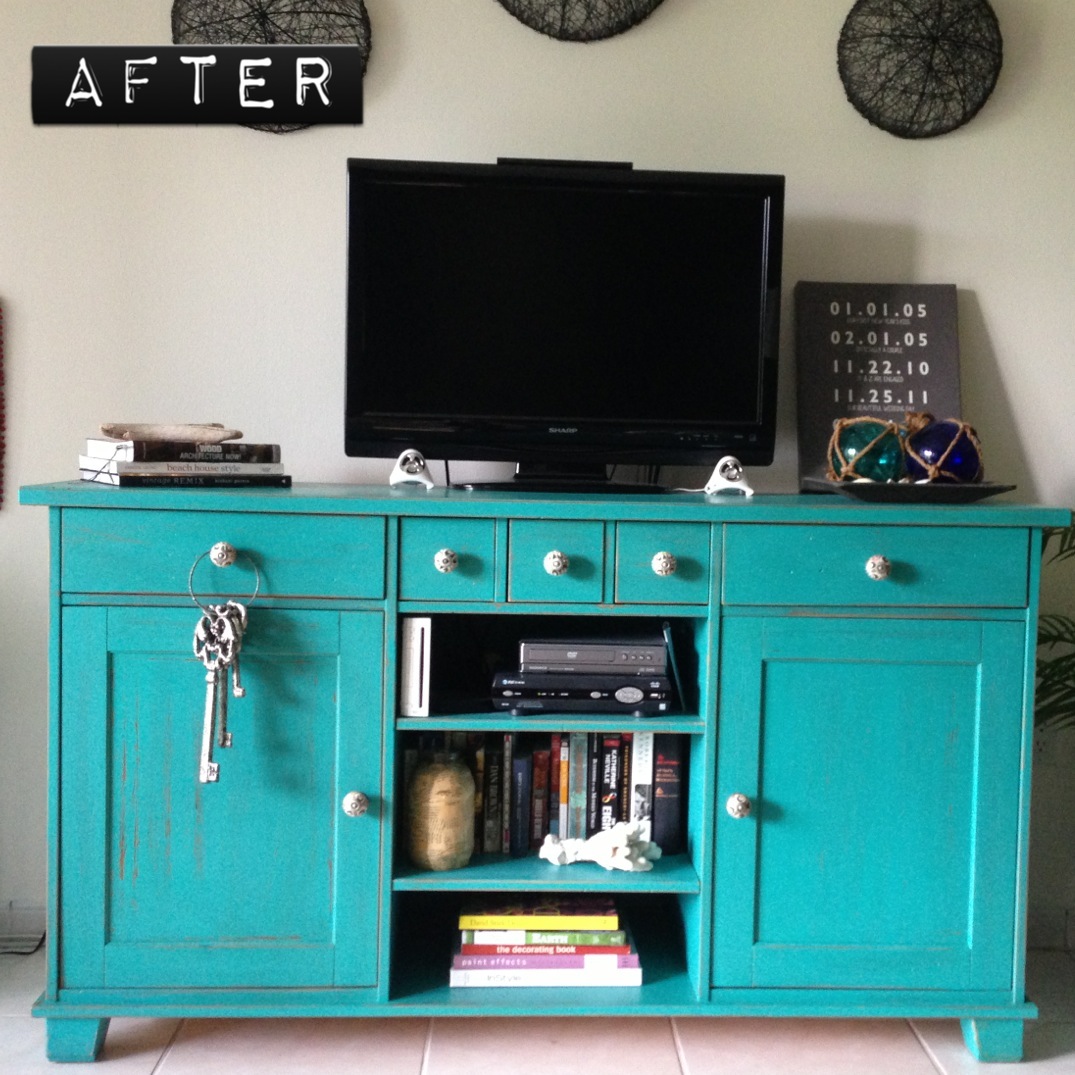
I’m very excited to share with you this DIY project. I wanted a nice piece of furniture to hold up our TV but every media center I saw online or in furniture stores was just too conventional, boring and oh so pricey. So, I took it upon myself to make it happen. On one of my Ikea field trips I saw a buffet table that caught my attention. It was large enough for the wall space and it had storage for all our board games. I also needed to make sure it had either a cabinet with glass doors or no doors at all for the digital receivers. With a little imagination and creativity this buffet table was about to become a customized, turquoise media console with a beautiful patina.
Materials:
- 100 grit sandpaper (3M P100)
- foam roller
- paint brush
- old t-shirt
- wrench, hammer or perhaps a chain
- Paint. I used Clark & Kensington Paint + Primer in one. Satin enamel in Torrid Turquoise
Here’s how I did it:
- Sand it down.
- Use an old t-shirt or cloth to clean any excess dust from the surfaces.
- Start painting from the bottom up. You should use a primer first, but since I bought paint and primer in one the process was shorter. Use the roller where you can and the paint brush where the roller doesn’t reach. The last thing you want to paint is the top surface. Also, try to direct your strokes with the grain of the wood and not against it. What I mean by this is… Wood has natural lines. When you look at it, what direction do those lines go? If they are horizontal, you want to make sure that your strokes are horizontal. The same general rule applies with sanding and staining (though not always).


- Let it dry completely!! You must, must, must wait!! If not, it won’t work.
- Since you will be distressing this piece you don’t need a second coat. Instead, take the sand paper and start rubbing it over the surface. You want to hit those areas that are more likely to get damaged over time. Those include the edges, corners, areas around knobs and the top.
- This part is fun and loud! Take a chain or a wrench (or a hammer or anything that will make a dent) and start making small dents in the furniture. Hit those edges and corners and some random parts of the piece. No fear! Just go for it! It’s fun, isn’t it?

- Now that you’ve smashed the crap out of your furniture, the knobs go in now. I replaced the ones that came with the package for ones found at Anthropologie. This makes the console much more personal and cute!

 Voilá! You’re done! Doesn’t it look fantastic? You’ve instantly given patina to this new piece of Ikea furniture. Try it at home and let me know how it goes!! I’m excited to see what you’ve done!
Thanks for reading & have a beautiful day!
Z~
Make sure to follow me on Instagram! I love sharing my life there! @Zaniamusic


